RSS

Category Archives: Gluten-Free Recipes

Pancakes

“Hey, Mummy…can you make me some pancakes for breakfast?”

And, there you have it…I was requested to wave my magical Gluten-Free wand and produce an order of scrumptious pancakes for my hungry 7 year old. The only problem was that there was no Gluten-Free flour in our freezer. That meant I had to shoot from the hip and whip up a batch of fresh Gluten-Free flour. Thank goodliness Piper was there to give me a hand milling all of the different grains.

When we had finished grinding and sifting our GF flour, we packaged and vacuum sealed most of it and stored it in our freezer for another day.

Piper helped me vacuum seal our freshly milled and sifted Gluten Free flour.

Piper helped me vacuum seal our freshly milled and sifted Gluten-Free flour.

This was actually a fantastic time to insert a bit of Homeschooling. Piper recited some of her math songs and then proceeded to tell me the Times Tables (because I apparently did not know them). I restrained a laugh because I actually had a thought to contact my old university math professor and demand a refund. Several years I had studied multivariable calculus and it was all rubbish because my 7 year old was going to teach me…Times Tables.

When the Times Tables were finished, we continued our day making pancakes together. Here is the recipe:

Gluten Free pancakes made by Piper and her Mummy.

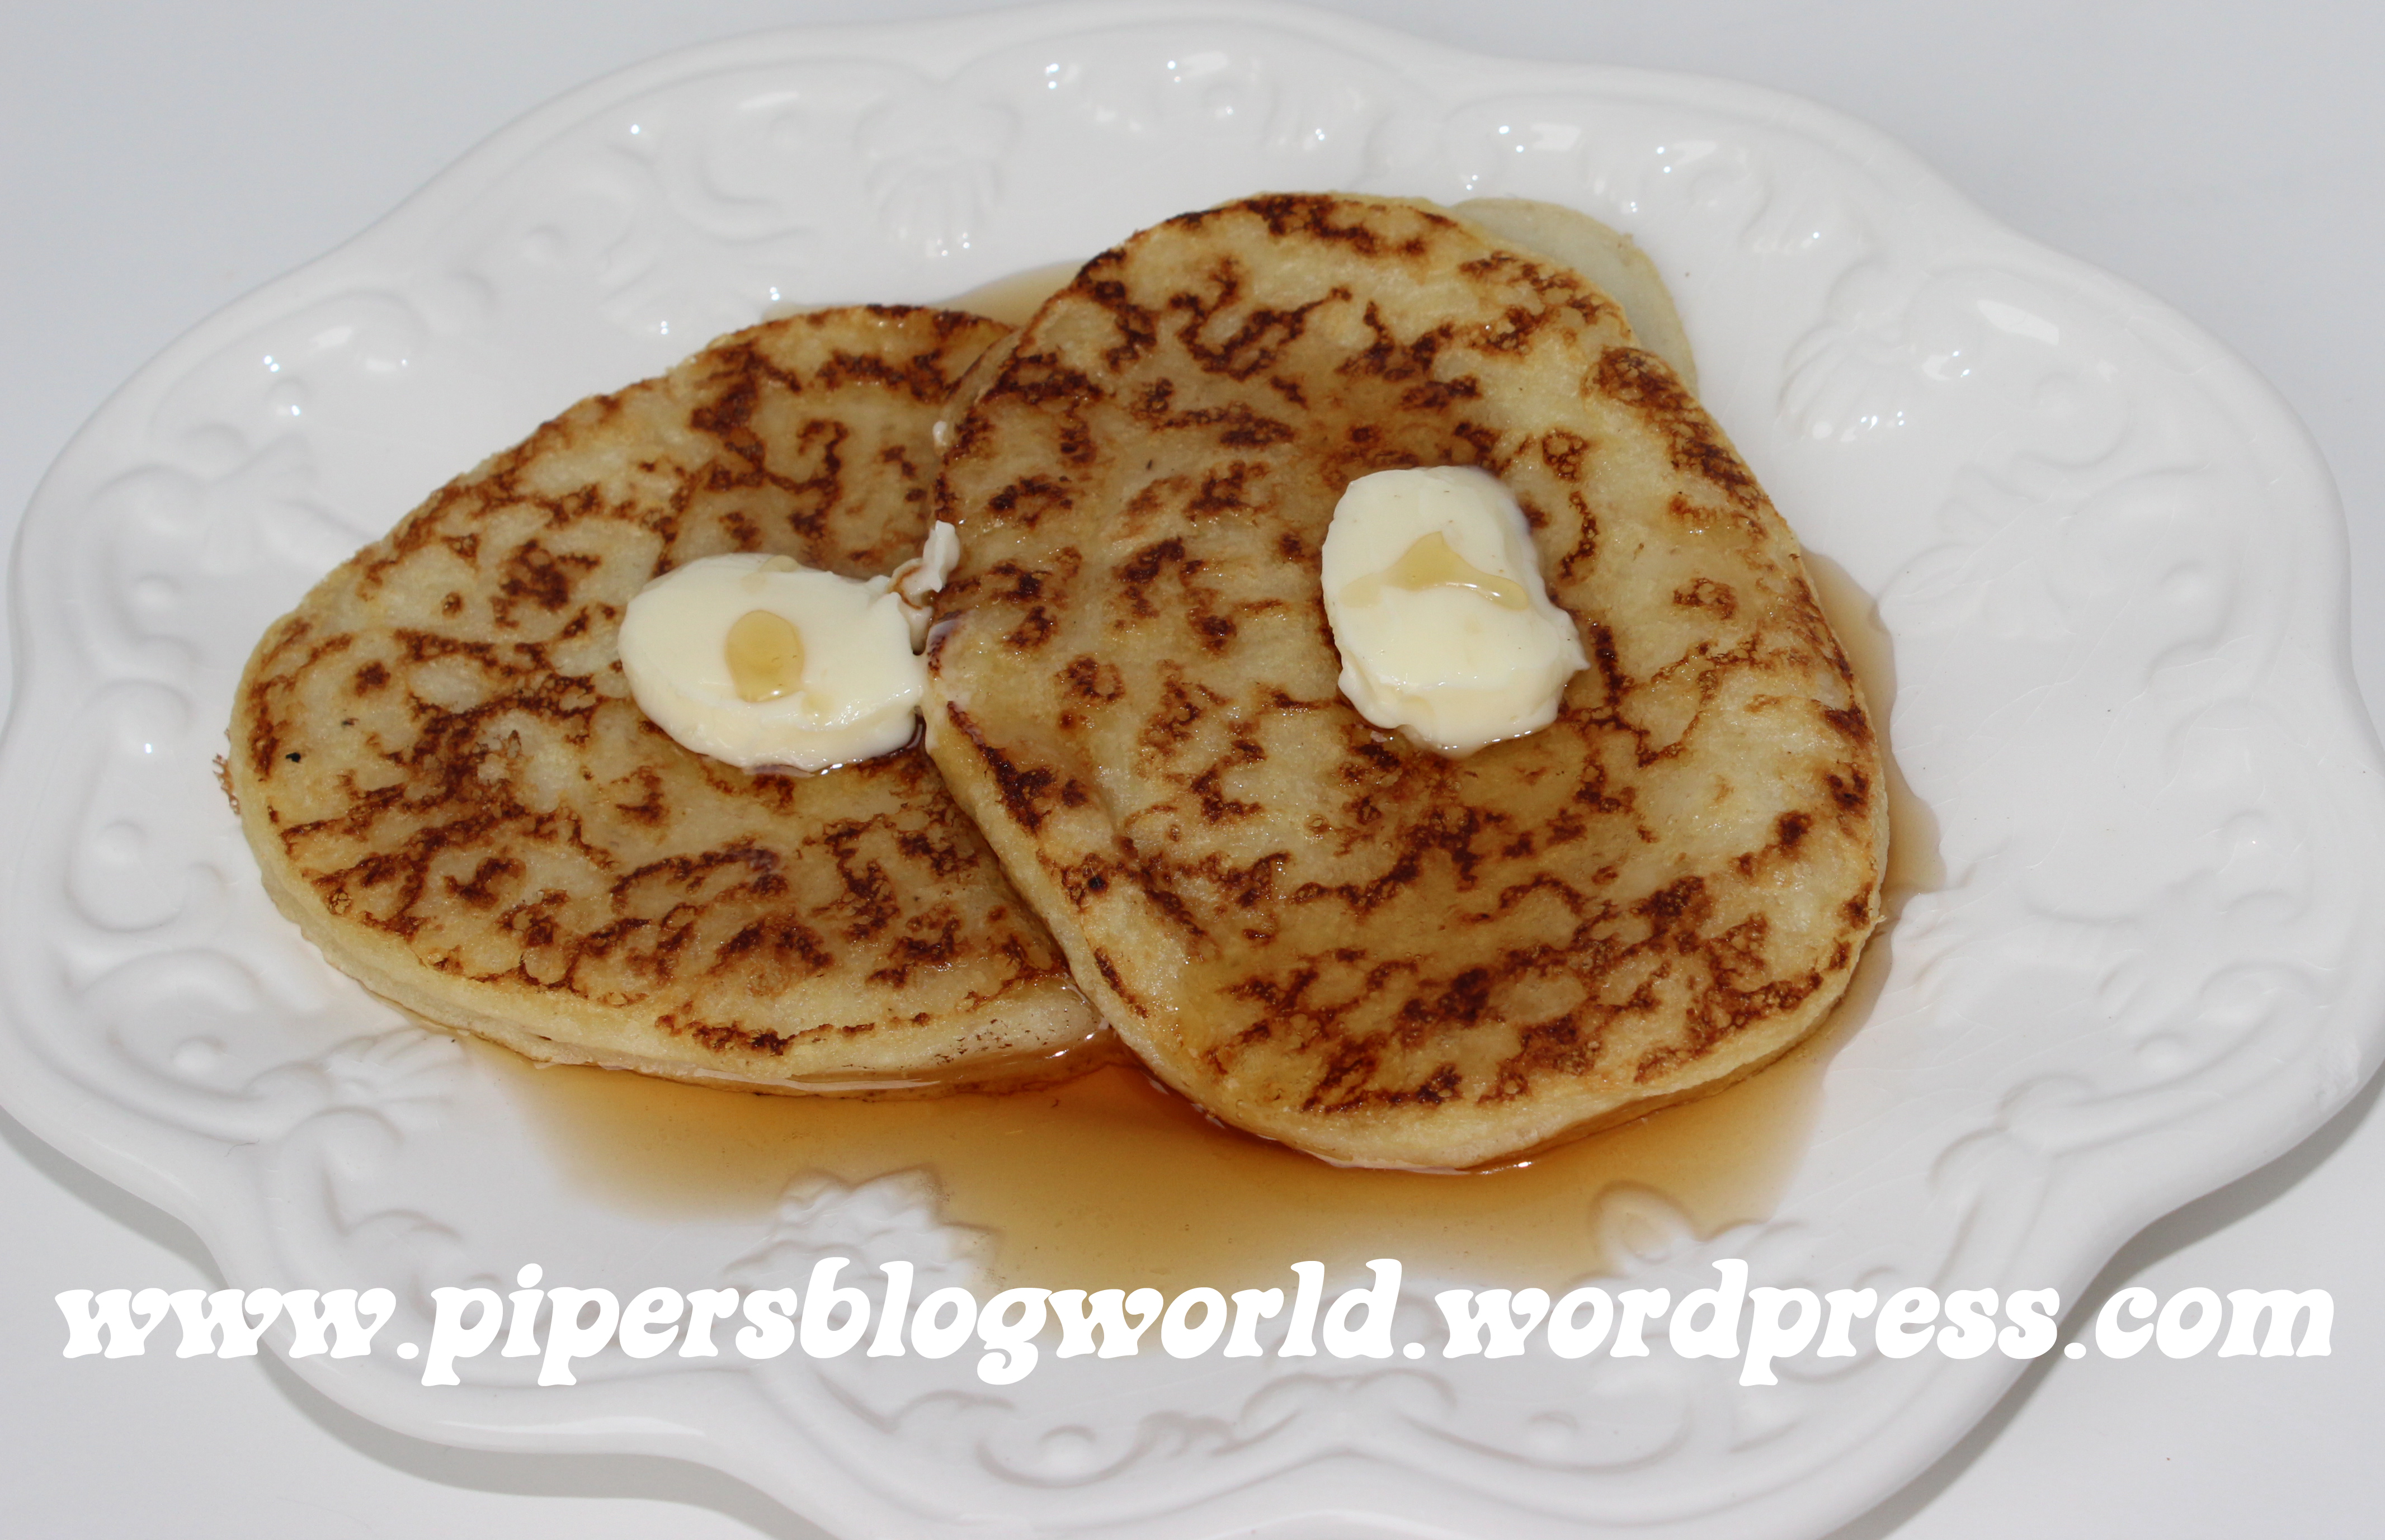
Gluten-Free pancakes made by Piper and her Mummy.

INGREDIENTS:

250 mL GF flour (I use GF flour from here)
5 mL xanthan gum
2.5 mL baking soda
5 mL baking powder
Pinch of salt
1 organic egg
25 mL olive oil
360 mL organic coconut milk (NOT coconut water)
5 mL vanilla

DIRECTIONS:

In a bowl whisk GF flour, xanthan gum, baking soda, baking powder and salt together.

In a separate bowl, whisk egg, coconut milk, vanilla, and olive oil together until frothy.

Add the wet ingredients to the dry ingredients and mix thoroughly.  The batter should be very loose.

Heat frying pan over medium heat. Use a large serving spoon to transfer batter to the prepared frying pan.

When the pancake is golden on bottom, flip and cook until the other side is golden brown as well. Serve immediately.

NOTE: I usually get 7 small pancakes with this recipe.

These pancakes were very light and our entire family loves them.

These pancakes were very light and our entire family loves them.


“Everything’s in it” Salad

A few nights ago, me and a friend of mine, had a delightful meal together. It was delightful because her daughter joined us (which made it G-Rated with respect to conversation). But it was also delightful because my salad was incredible! I just HAD to make this salad!

Alas, I did not have the recipe, nor did I have many of the ingredients. Therefore, I took it upon myself to create something of a “knock-off” of the salad to which I will probably never get the recipe for.

I am taking a leap of faith (more like a leap off a cliff), by delivering a decent salad which is “chok-a-blok” full of vitamins, minerals, and nutrients to which I cannot pronounce.  I call it “Everything’s in it” Salad”.

"Everything's in it" Salad

“EVERYTHING’S IN IT” SALAD

INGREDIENTS

Variety of leafy greens, (I used Western Family Organics Spring Mix which has red and green Romaine lettuce, baby spinach, green Swiss chard, etc.)Alfalfa, Clover, Pea, Mung Bean, Lentil, Aduki and Garbanzo sprouts (they come in a mixed package)
125 mL cooked quinoa
15 mL oven roasted hazelnuts
15 mL oven roasted sunflower seeds
15 mL pumpkin seeds
90 mL feta cheese Raspberry
Vinaigrette to taste (I used Simply Natural Organic Raspberry Vinaigrette)

DIRECTIONS

The key to this salad is a large variety of greens.

On a large plate, pile on the variety of greens including all the sprouts.

These are the greens I used from Save-On Foods.

Add cooked quinoa to the greens and sprouts.Be sure to roast the nuts and seeds.

Add the sliced tomatoes, roasted hazelnuts, sunflower seeds, and pumpkin seeds to the greens.

I grilled my feta cheese so that it was gooey, but grated or crumbled feta is just as yummy.

Add feta cheese to the salad.

Oops! I inadvertently showed the French side of the bottle. How can you tell I am Canadian?

For the raspberry vinaigrette, I chose to go with Simply Natural’s Organic Raspberry Vinaigrette. Normally, I would have turned my nose up and scoffed at store-bought vinaigrette’s, but on this day, I simply did not have the patience, talent or time for that kind of nonsense. Pooh!

"Everything's in it" Salad

Even Piper likes this salad…because of the colours, not for the nutrients.


Tempura Batter for Deep Fried Fish

Deep fried fish is a huge family favourite in our home. Actually, anything deep fried is always a popular choice. Who am I kidding?

Since I have gone Gluten-Free, I have chosen to alter very few of my passed-down family favourite recipes. They are just not the same. But when I looked at this recipe, given to me by my mother many years ago, I found it extremely easy to make it Gluten-Free. Thank goodliness! There may have been a mutiny in my family.

Deep Fried Cod Fish with a Tempura Batter

TEMPURA BATTER

INGREDIENTS:

125 mL Gluten-Free flour (see recipe in previous post: Gluten-Free Tips and Flour Recipe)

125 mL cornstarch

10 mL baking powder

5 mL salt

125 mL water

1 organic egg

DIRECTIONS:

Combine all ingredients in a large bowl and whisk until they are incorporated evenly.

All of the ingredients are placed together in the bowl.

If the batter is too thick, thin it with more water.

DEEP FRIED FISH:

INGREDIENTS:

Cod Fish (cut into thick steaks)

250 mL Gluten-Free flour

2 organic eggs

DIRECTIONS:

Fill a large pot with cooking oil.  Preheat (about 400° F) stove top.

Cut the cod (if not already done) into steaks.

Cod steaks are prepared.

Place all of the Gluten-Free flour on a large plate.

Whisk the eggs in a medium sized bowl.

Dredge/coat the cod steaks in the plated flour. Then transfer flour-coated fish to the egg wash.  Dip the fish into the egg to coat all over.  Then once again, transfer fish back to the platted flour for a final coating.

Plated flour and egg wash for the cod.

Let’s talk about oil temperature for a few moments. I do not know the exact temperature in which to deep fry fish in, but it should be somewhere around 375°F to 400°F. The lower your temperature, the more oil the batter soaks up. I personally prefer the higher temperature because it crisps up far nicer.

Now, fill a large cooking pot with deep frying oil. When oil has reach appropriate deep frying temperature, gently place the coated flour into the pot.

After 3-4 minutes, the fish should be golden brown on one side. Flip the fish over for an additional 2-3 minutes (or until the alternate side is golden brown).

Scoop the fish out of the oil and allow to rest on paper towel to absorb any excess oil.

The result is succulent pieces of cod wrapped inside a crispy deep fried tempura batter.

Serve with lemon or lime wedges.  Yummy!!


Roasted Squash Cheesecake

Back when it was around Thanksgiving, I had an excess amount of squash.  A delicious recipe was forwarded on to me and with the creator’s permission, I felt obliged to share this delectable sweet. I have altered it a wee bit, but otherwise, the recipe’s credit goes to Celine Giesbrecht of Celine’s Just Desserts.

To inquire and learn more about Celine’s Just Desserts, check her out on Facebook. If you ever get the chance to order one of her desserts, DO IT!!

Roasted Squash Cheesecake

ROASTED SQUASH CHEESCAKE (by Celine Giesbrecht of Celine’s Just Desserts)

INGREDIENTS (For the crust):

1 272g bag of Gluten-Free ginger snap cookies (I use PastsyPie Snappy Ginger Cookies)

65 mL butter

INGREDIENTS (For the filling):

375 mL roasted cooked squash

4 organic eggs

200 mL granulated sugar

16 oz cream cheese (the brick kind, not the kind in the tub container)

2.5 mL salt

6.25 mL ground cinnamon

5 mL ground ginger

2.5 mL ground cloves

1 mL freshly grated nutmeg

DIRECTIONS:

Preheat oven to 350°F.

Use a Vita-Mix to whiz the cookies until they are finely crushed. I do this in batches. When finished crushing the cookies, place them all in a medium sized bowl.

I use this brand because it has a beautiful ginger taste.

Only whiz a few cookies at a time in the Vita-Mix or food processor to get a fine crumb consistency.

In a small saucepan, melt butter. Pour melted butter into the crushed cookie bowl. Combine evenly.

Melted butter in a saucepan.

Empty butter/cookie crumbs into a 10″ spring form cheesecake pan. Set aside.

The cheesecake crust is smoothed into place.

Now, on to the filling part of the recipe. In a large bowl cream together cream cheese, sugar, salt, cinnamon, ginger, cloves and nutmeg. Be sure to scrape the bottom of the bowl so there are no lumps.

Cream the cream cheese and spices together in a mixer.

I use a Vita-Mix for this next part. Whiz the roasted cooked squash with 4 organic eggs until blended well and creamy. The first time I made this recipe, I found that my squash was too chunky and did not have the silky smooth consistency that I was looking for. I fixed that immediately by dumping it entirely in my Vita-Mix. Ta-da! Instant silky texture.

Whiz the roasted squash and organic eggs in the Vita-Mix.

Pour squash/egg mixture into the the cream cheese mixture. Whip with a mixer (I use a KitchenAid mixer) until fully incorporated and silky smooth.

By adding the smoothed squash to the cream cheese mixture in a mixer, the entire cheesecake consistency becomes very silky and smooth.

When fully mixed, pour the entire squash/cream cheese mixture into cheesecake pan with the crushed cookie crumbs.

Smooth the squash/cream cheese mixture over the crust in the cheesecake pan.

Bake for 45 minutes in a 350°F oven.  After the allotted 45 minutes is up, turn off oven and leave the oven door slightly ajar. Allow to cool completely in the oven before removing it. This will assist with as few cracks as possible, when the cheesecake is setting.

TIP FROM CELINE GIESBRECHT: I slide the pan of water on the lowest rack in my oven, then put the cake on the middle rack. It gives it a humidifyer effect in the oven and have never had a cracked cake yet. It works great for winter baking when the air is really dry.

Chill for 4 hours or overnight in the refrigerator.

Serve will a dollop of whipped cream.

YUMMY!!

Last week, I took this little gem to one of our Homeschooling lunches.  It was the third time I had made this recipe and I still love it!!


Banana Coconut Cream Pie

When it comes to pies, my family prefers the cream-based kind. There is something about a decadent, luscious, velvety, creamy pie which feels like a comforting hug. Although, this Gluten-Free hug can put pounds on your hips, so take care.

Banana Coconut Cream Pie

BANANA COCONUT CREAM PIE

INGREDIENTS:

1 pre-cooked pie crust (completely cooled) – See the Post on “Pie Crust Pastry” recipe

2-3 bananas

125 mL fine coconut (toasted)

80 mL cornstarch

125 mL sugar

1 mL salt

750 mL milk

2 organic egg yolks

5 mL vanilla

15 mL butter

300-400 mL whipping cream

DIRECTIONS:

To toast the coconut, spread out the coconut on a cookie sheet (I use a rectangle baking stone lined with aluminum foil). Place in a 350°F oven for 5 minutes. When finished toasting, remove from oven and allow to cool.

Toasted coconut fresh out of the oven.

Place the cornstarch, sugar, and salt in n a medium saucepan. Use a small whisk to mix all the dry ingredients together.

Cornstarch, sugar, and salt in a saucepan.

Slowly, add the cold milk to the saucepan. Stir.

Cold milk is added to the cornstarch mixture.

Over medium heat and whisking constantly, bring mixture to a soft boil. This may take about 5-7 minutes. Do not leave stop whisking the entire time. Your pudding mixture will burn. Tears on my part have been known to shed because I did not listen to my advise.

Turn down the heat and cook for another 5 more minutes. Once again, whisk constantly. Remove saucepan from stove.

Thickened pudding mixture is added to egg yolks.

In a small bowl add a little amount of the pudding mixture to 2 egg yolks. This is not the time to dilly dally. Whisk immediately so that the eggs do not scramble.

Once the eggs have been tempered with the pudding mixture, return the egg-pudding mixture back to the saucepan.

Turn up the heat to medium-low and cook the egg-pudding mixture for an additional 3 minutes to cook the egg yolks thoroughly.  When the time is up remove saucepan from the stove and turn off element.

The toasted coconut is added to the pudding mixture.

Add the toasted coconut to the pudding mixture. Then add vanilla and butter. Stir thoroughly. Allow the pudding to cool completely before putting on the pie. If you miss this step, your bananas will turn brown from the heat.

Sliced bananas over the cooked pie crust.

Slice bananas and place all around the cooked pie crust.

I added a little bit of toasted coconut and some bananas to the top of the piped whipped cream.

Poor cooled banana coconut pudding into the cooked pie crust.

Top with whipped cream and garnish with bananas and toasted coconut.

A very easy and tasty pie.